Create field mapping groups
After you create an Excel Functions integration, you must map fields in Jama Connect to cells in the Excel template. This mapping is accomplished by creating field mapping groups. You create a separate field mapping group for each Jama Connect item type that you want to integrate with the template.
You can map different Jama Connect sets to the same Excel template by creating multiple field mapping groups. Each group must apply to the same Jama Connect project and Excel template.
The two types of field mapping groups are:
Items in the Jama Connect Project Explorer Tree
Test runs and test cases
To create field mapping groups:
On the Integrations page, select the link for the integration you just created.

Select the Field Mappings tab.

For each field mapping group you want to add, select Add field mapping group.

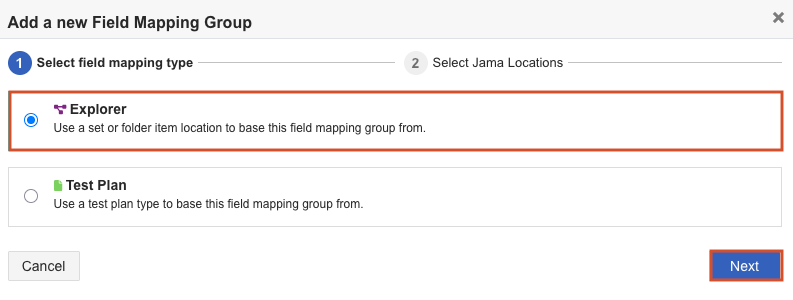
On the page that opens, select Explorer, then select Next.
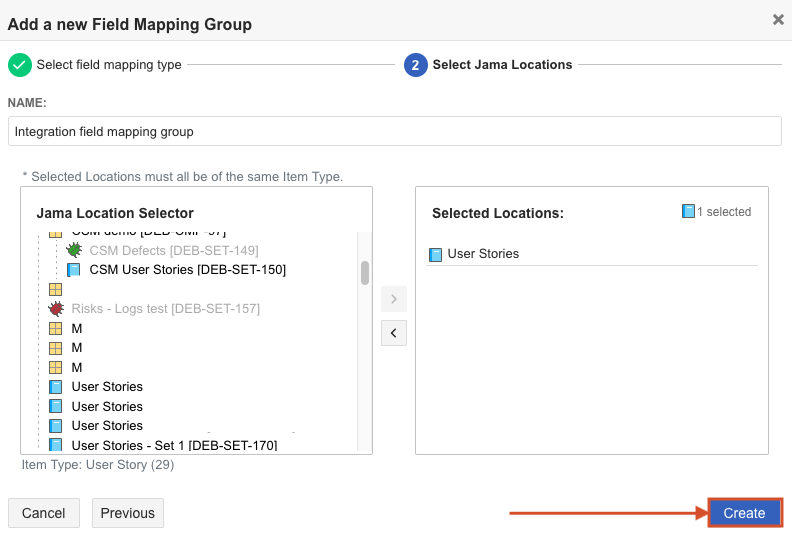
Complete these fields, then select Create.
Name — Enter a descriptive name for the field mapping group.
Jama Location Selector — Select the Jama Connect sets or folders that you want to sync. All selected sets must use the same item type (for example, User Stories or Defects).
Using the drop-down lists, map the fields and cells to one another. Add a separate row for each field/cell combination, as shown in this example.

Each row contains these fields:
Select Field — Choose the field in Jama Connect that is being mapped to Excel.
Directionality — Choose whether data is written from Jama Connect to Excel (→) or from Excel to Jama Connect (←).
Select Sheet — Choose the sheet in the Excel template where the cell is located.
Input Cell — Enter the cell location in the Excel template. For example, G5.
Organize your mappings in this order:
Fields written from Jama Connect to Excel (input fields).
Fields written from Excel back to Jama Connect after the function runs (output fields).
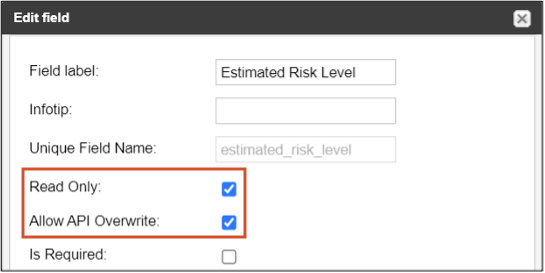
Typically, output fields are read-only in Jama Connect to prevent users from updating them manually. If you mark a field as read-only in Jama Connect, you must also select Allow API Overwrite in the field settings to allow the integration service to write the updated Excel value to the item.
Select Save Changes.
Your field mapping groups are saved.