
Jama Connect Interchange Help

Create a single-project Jira integration

This procedure explains how to create a "single project" integration, which establishes rules for syncing items between one Jama Connect project and one Jira project.

This process consists of these steps:

Step

Details

1. Complete the Jama Connect Integration wizard to configure a Jira integration.

Create a "single project" integration to establish rules for syncing items between one Jama Connect project and one Jira project.

2. Map fields in Jama Connect to the corresponding fields in Jira.

Use field mapping groups to map fields in Jama Connect to Jira. Create a separate field mapping group for each Jama Connect item type (for example, User Stories and Defects).

Important

Don't use the same Jama Connect item type or Jira issue type in more than one mapping group within an integration. This can lead to conflicts or duplicates when items are synced.

  1. Configure a single-project Jira integration:

    1. In Jama Connect, create a new, empty set or folder in the Explorer Tree. In a later step, you will add items to this set to test the integration.

    2. In Jira, create a new, empty progect for testing purposes. In a later step, you will use this project to test the integration.

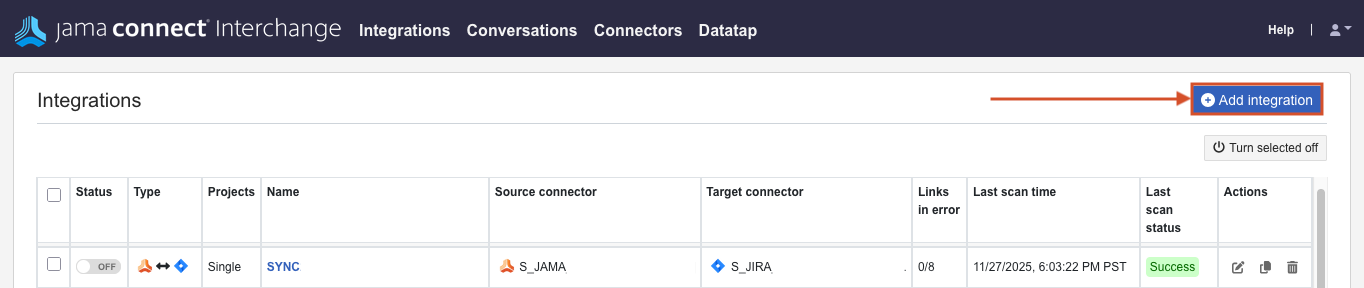
    3. In the Jama Connect Interchange header bar, select Integrations.

    4. On the Integrations page that opens, select Add integration to open the Jama Connect Integration wizard.

      JCI_Add_Intecgration_button.png
    5. Complete each page of the wizard, then select Next.

      Integration Type — Select the integration type:
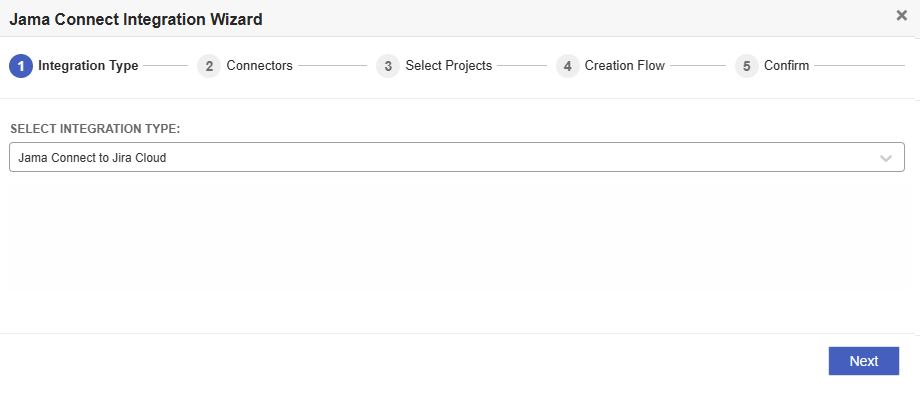
      UUID-cad1dc54-897f-c2e1-fdc6-a732a3d3500e.png
      • Select integration— From the drop-down list, select Jama Connect to Jira Cloud or Jama Connect Jira Data Center.

      Connectors — Choose the connectors you want to integrate:

      The Connectors page of the Jama Connect Integration Wizard includes two settings, Select Jama Connect Connector and Select Jira Cloud Connector, where you select a connector from each drop-down list.
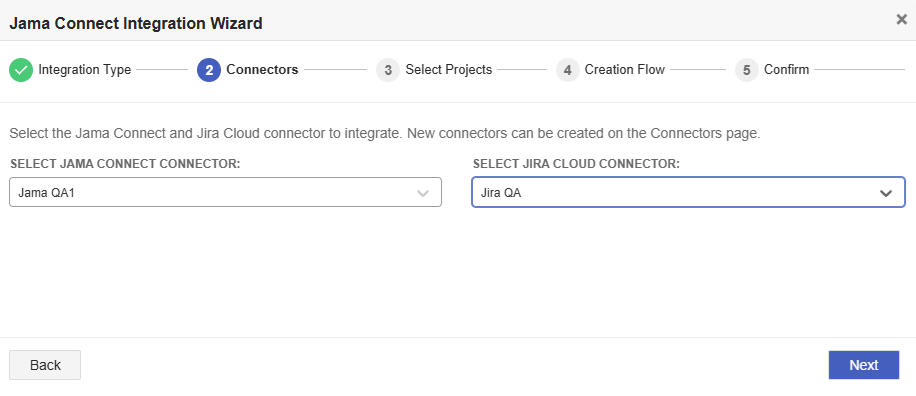
      • Choose Jama Connect for Source Connector — Select the Jama Connect connector that you want to integrate. This is the same connector you created in Link to your Jama Connect instance (Jira).

      • Choose Jira for Target Connector — Select the Jira connector that you want to integrate. This is the same connector you created in Link to your Jira instance.

      Select Projects — Choose the Jama Connect project and Jira project.

      The Select Projects page of the Jama Connect Integration Wizard includes two settings, Select Jama Project and Select Jira Project, where you select a project from each drop-down list.
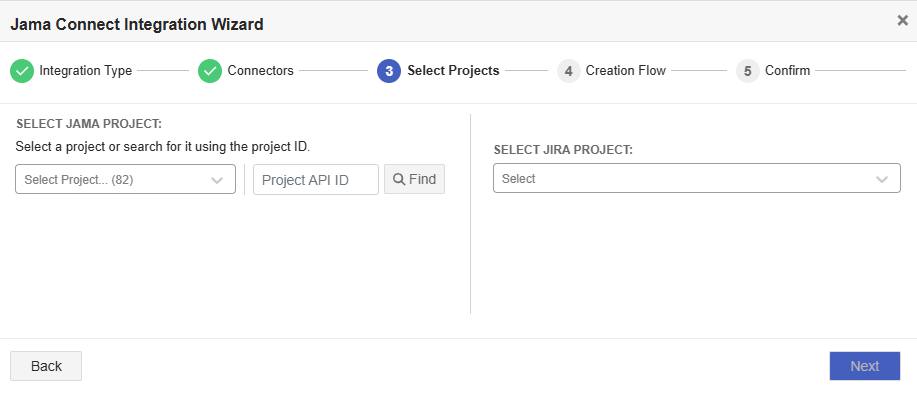
      • Jama Connect — For the Jama Connect connector, search or browse to the Jama Connect project that you want to integrate.

      • Jira — For the Jira connector, select the Jira project that you want to integrate.

      Item Creation Flow

      The Creation Flow page of the Jama Connect Integration Wizard includes three exclusive options, Bidirectional, Jama Connect to Jira, and Jira to Jama Connect.
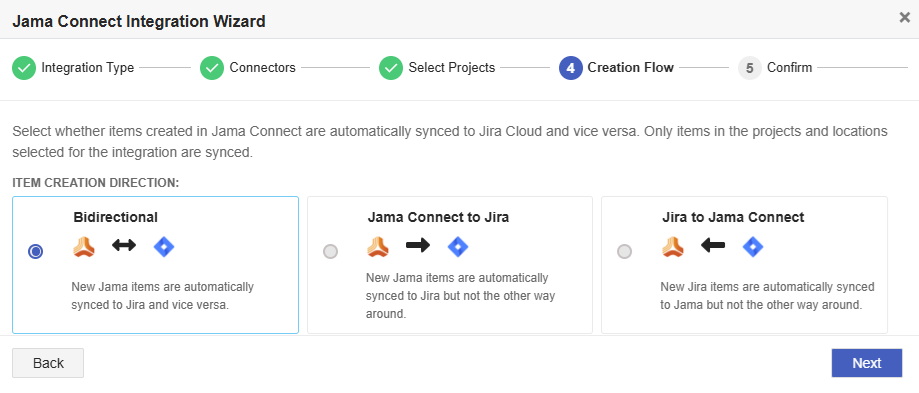
      • Bidirectional Item Creation — When an item is created in Jama Connect, a corresponding issue is created in Jira, and vice versa. This keeps both systems in sync with the same number of items. Attachments, Comments, and Comment Replies created in either system are added to the other system.

      • Jama Connect to Jira Creation — Items created in Jama Connect are automatically added to Jira, but not the other way around. Only Item Attachments, Comments, and Comment Replies created in Jama Connect are created in Jira.

      • Jira to Jama Connect Creation — Items created in Jira are automatically added to Jama Connect, but not the other way around. Only Item Attachments, Comments, and Comment Replies created in Jama Connect are created in Jira.

      Integration Configuration

      The Confirm page of the Jama Connect Integration Wizard displays the setting and options you selected and a Submit button.
      • Name your Integration — Enter a descriptive name for the integration.

      • Frequency — Select the frequency with which you want the integration to run.

      • Sync Attachments — Toggle to Enabled to sync item attachments.

        Only attachments of less than 25 MB are copied between systems. If an attachment exceeds 25 MB, a placeholder text file is created in the other system to indicate that an attachment exists in the linked item.

      • Sync Comments — Toggle to Enabled to sync item comments.

        Note

        Interchange does not support edits to Jira comments. If a Jira user edits a comment after posting it, the edited version is not synced to Jama Connect. Only the original comment text exists in Jama Connect.

        Jira Data Center integrations only — Comments with embedded images are not supported. The comment text syncs as expected, but the image file is synced as a URL only.

    6. Select Submit to complete the wizard.

    The integration is saved in a disabled state.

  2. Configure field mappings for Jira:

    1. On the Integrations page, select the link for the integration you just created.

      The Integrations page displays a search string and a 2-column table (Type and Name), with User Stories highlighted.
    2. Select the Field Mappings tab.

      The Field mappings tab is highlighted on the Jama to Jira integration page.
    3. For each field mapping group you want to add, select Add new field mappings group.

      The Add new field mapping group button is highlighted at the bottom of the integration's Field mappings tab.

      The Add a new Field Mapping Group page opens.

      The Add a new Field Mapping Group page includes two columns, Location Selector and Selected Locations, as well as drop-down lists for primary Jama location and Jira issue type.
    4. Complete these fields, then select Create.

      • Name — Enter a descriptive name for the field mapping group.

      • Jama Location Selector — Select the Jama Connect sets or folders that you want to sync. All selected sets must use the same item type (for example, User Stories or Defects).

      • Select Primary Jama Location — Select the Jama Connect set or folder where you want to sync new items coming from Jira.

      • Select Jira Issue Type — Select the Jira issue type to sync with. When items are synced from Jama to Jira, they are created in Jira using this issue type. When issues are synced from Jira to Jama Connect, only issues of this type are selected for sync.

      The page closes and the new field mapping group is created.

    5. Using the drop-down lists, map the Jama Connect and Jira fields to each other. Begin with a few fields first (for example, Name and Description), then test the integration before adding more fields.

      The example User Stories Set page displays rows with two columns for mapping fields between Jama Connect and Jira.

      Important

      A field appears in the Jira drop-down list only if you configure it to be displayed on both the “Create issue” and “Edit issue” screens for the Jira issue type. This requirement applies only to company-managed Jira projects.

      You must map all required fields in the target system. For example, if Jira requires that the Summary field must be filled out to create the item, make sure you map the Summary field. Required fields are labeled with "(required)" in the field mapping picklist.

    6. Select Save Mappings.